Monday, August 30, 2010

In appreciation of PTI!

Hey everyone! It's a blog hop dedicated to Nichole Heady and the rest of the Papertrey Ink team. It's to let them know how much they are appreciated and that there are many friends (fans!) who will walk beside them as they continue to grow Papertrey Ink, through the small bumps and all.  I found PTI just last summer and it's the reason my creativity has soared and my crafting has moved to another level. I see things so differently now and their products and ideas make me look like a superstar to my friends and family! lol :) How can you not love that!


2010 08 30_2479_edited-1

I love the countdowns and release time and do not for one minute forget how much effort that must take for everyone. I appreciate absolutely everything that PTI does to make itself a successful company, from the tutorials, to the blog posts, to the bright and clear photography used on the blog pictures, to the outstanding design team, to the packaging, to the pleasant atmosphere created on the forum, to the customer service, to the late nights and tough decisions. My wallet hasn't been the same in over a year and I wouldn't have it any other way. I think I really would cry if PTI ceased to exist.

Nichole, Jane, and Julie, your company has given me so much joy and happiness. Thank you, truly, from the bottom of my heart and I wish you much continued success. Blessings to you all, Jennifer.

2010 08 30_2483_edited-1

Sunday, August 22, 2010

A tour of my craft room

Craft room
I showed you my Best Scrapbook Shelf in this post I did the other day but I thought I'd show you the rest of my craft room. One of the rooms in our basement is mostly finished and it has our "office" and the craft room in it. The kids have their craft space in here as well.

Let's start on the left. You can see my sewing machine and notions drawers. The notions drawers are from an antique sewing machine. I love to combine the old with the new throughout my home!

{B} Punch drawer

Let's take a look in the cabinets along the wall, shall we? DH and I were shopping in Home Depot one day and these cabinets were in the middle of the floor at a deep discount. We just couldn't pass it up. They work beautifully in the space. In the top drawer is my punches. There's not too many there, is there? ;)


{C}
The next drawer down is my extra adhesives and those that I use less frequently. My most used adhesives are in the MM carousel on my table. Also in this drawer are my envelopes, and glassine and cello bags.


{D}
In the bottom drawer are things I reach for less frequently...crimper, heat gun, label maker, glue gun, kids' crafts, mini albums etc.


{E}
The opening in this next cabinet was supposed to be for a microwave. But here it works great to hold my drawers of pictures. I did Stacy Julian's class a few years ago (Library of Memories) on organizing pictures to better scrapbook them. The premise is to store your pictures by "Things you do", "Places you go", "People you love", and "All about us". This system works really well for me and how I scrapbook. In this space you can also see my binders "B" and "M" that hold memorabilia for my kids, and some other pockets holding ongoing scrapbook projects. Sigh. Someday I'll get these done. On top of my photo drawers is a bunch of page protectors held together by rings. In each page protector is a sheet of letter stickers.


{F}
In the bottom drawer is my Big Shot and all my dies, nestabilities, impression plates, and embossing folders. I love that the drawers in these cabinets are so deep for these sorts of things.


{G} Antique drawer holding stamps, ribbons, and special cards.

Hanging on the wall above my cabinets is my antique drawer turned on its side. It holds my wood stamps and PTI ribbon. My Papertrey Ink stamps are in the red leather box you can just barely see on the bottom left of the picture. You can see my new way of storing my PTI sets here.


{H}
Sitting on the counter top is three trifle bowls that I purchased at Target. One bowl holds small ribbon bits. Another bowl holds flowers. And the third bowl holds buttons. Ideally, these bowls would be on a shelf but I've yet to find one that I like and that DH will agree to hang. We're at a bit of an impasse right now. lol Also sitting on the counter is this multi drawer cabinet I bought at a local farm store and spray painted white. I holds my 3D alphas - chipboard, Heidi Swapp clear, metals etc.


{I}
Above my Best Scrapbook Shelf is my Clip It Up by Simply Renee and a Making Memories filing thingy. Both of these items hold misc flat embellishments e.g. stickers, punch out die cuts, rub-ons etc.


{I}
To the right of my Best Scrapbook Shelf is my main work area. When I stand here, I can see the TV in the next room or watch the kids play in the rec room. My Genesis trimmer sits to my left on the table. I also have an Ott light that helps me see what I'm doing. You can never have too much light! The Cropper Hopper cubes hold miscellaneous stuff - albums, Cropper Hopper folders/pockets, album refill pages, cork sheets, etc. My PTI paper is sitting in a wooden box on the floor right now. Eventually, I'd like to find a better solutions - perhaps another Cropper Hopper box? I'll have to find something soon because my wooden box isn't going to hold much more. :)


{J}
Just a quick shot of my Making Memories tool carousel. I keep my most used tools and supplies here in the carousel right on my desk for easy access: hand punches, scissors, adhesive, bone folder, ruler, Corner Chomper...


{K}
A close-up shot of my very full wooden box that holds my PTI cardstock and patterned paper. It also holds a few other 6x6 paper pads.


{L}
Just to my left, on top of my Best Scrapbook Shelf, is my pens and pencils, notepads, and a little cheat sheet of sorts that I made to help me remember how my knots will look. Heather Nichols had a little video on her blog several months back and it helped me tremendously so I went ahead and made this so I'd not forget!


{M}
Here's just one last shot of my main work area. I try to clean up after every project but that doesn't always happen.

Thanks for coming along on my tour. I love to look at others' craft rooms so thought it only fair that I show mine.

Saturday, August 21, 2010

Vintage-y & glittery "thank you"

Thank You to Sarah
Hi everyone! Are you enjoying your Saturday? I had a Girl Scout camp out last night and I'm so tired. I've already taken a nap but I'm sure I'll feel better tomorrow after a good night's sleep in my own bed (and not on the very hard ground!)

So here's a card I made a couple months for my sister. I don't think I've shared it yet. It's a little shorter than an A2 but not quite a square. The green patterned paper is some My Mind's Eye that I absolutely adore and will be so sad when I've used my last scrap. Card base is Rustic Cream and there's also some Dotty Biscotti, vintage book paper, and the small scalloped border is Plum Pudding topped off with a little glitter. I'm really starting to like using glitter! :)

Stamp sets used include PTI's Get To The Point and Cupcake Collection. Ribbon is Hibiscus Burst satin.

Hope you enjoyed the card and enjoy the rest of your weekend. :)

Wednesday, August 18, 2010

Best Scrapbook Shelf

1. Front view of Best Scrapbook Shelf.

**Warning** This is a really long post! :) Sit back and relax a spell...

I love, love, love my 
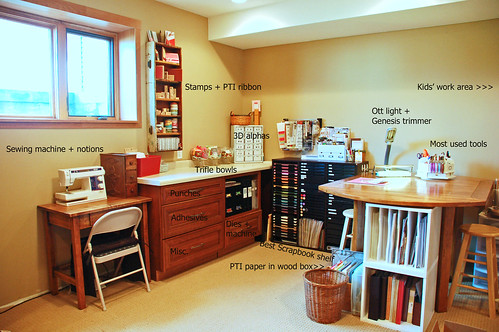
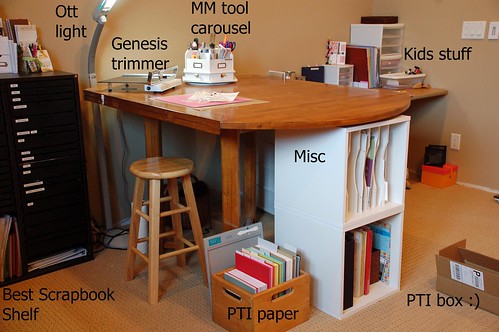
Best Scrapbook Shelf. I had lots of Sterilite drawer units for the longest time and discovered that I really like things in drawers. I like having all similar items together and the easy access but I also like the neat & clean look that drawers provide. I researched my options and after considering my space and dollars available I decided that the BSS Triple Large unit was going to be the best solution for me. Now, granted, this unit is not cheap. But I saved and saved and saved - well over a year and a half - to get the unit and the drawers. And I love it. It's perfect! It's a very efficient use of space and the quality is wonderful. I opted to buy the cabinet separately from the drawers, that is, I did NOT buy a kit because I wanted to customize the drawers for my use. There was no price break to buy the kit so I didn't lose any money doing it this way.
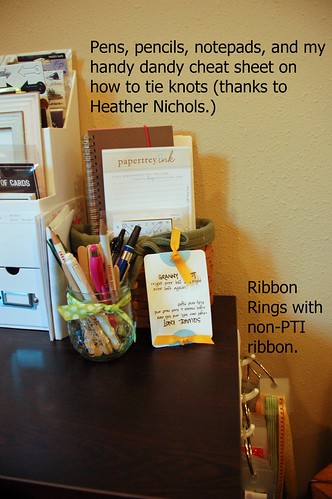
You can just see my 
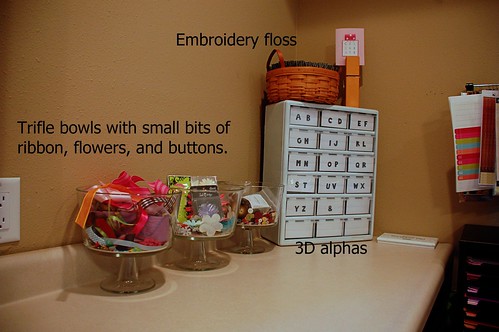
Ribbon Ring hanging there on the right side of my cabinet. This is where all my non-PTI ribbon goes. I have several rings that are hanging on some 3M removable hangers.

12x12 cardstock.
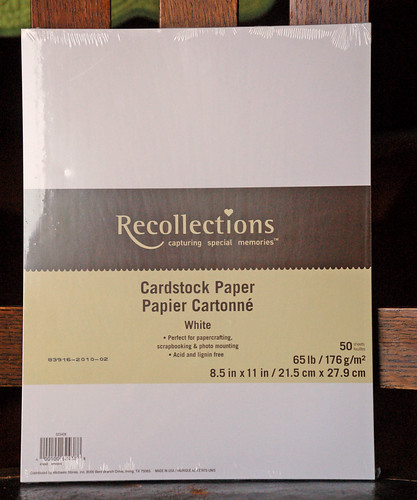
The entire left side is filled with paper shelves to hold my 12 x 12 cardstock and some patterned paper. It's organized by ROYGBIV. Most colors have two shelves - the top one holds misc patterned paper that is generally all one color and not part of a specific mfr. and then the second shelf holds the cardstock. For mfr where I have a lot of their patterned paper - My Minds Eye, for example - I have those filed on the bottom of the middle section. For some reason I have lots, and I mean lots, of blue cardstock. I think it takes up at least three shelves.

All drawers are labeled.
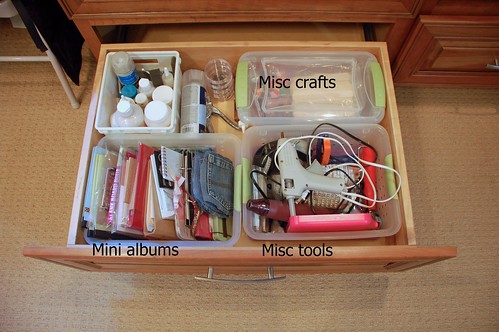
All the drawers are labeled with my handy, dandy label maker. Gosh, I love that thing. I label my drawers for several reasons: 1) so my kids know where everything is and more importantly know where to put things back; 2) so I know where everything is and know where to put it back; and 3) because I'm an organization freak and like to label things.

Do you want to see what's in all my drawers? Alright, I'll show you. But only because you asked so nicely. :)

Dwr 1: PTI inks + my favorite brown ink by Nick Bantok
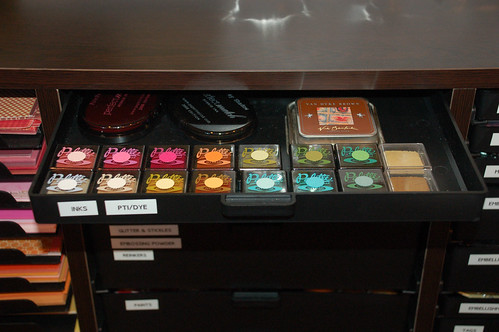
Let's start with the middle section - it essentially holds all my "colorants." Here's the top drawer. It's a 1" drawer and it holds my PTI inks and my mostest favorite brown ink in the whole world - Van Dyke Brown by Nick Bantok. Did you see how I punched a small circle of coordinating cardstock and adhered it to the lid of the ink cube? Makes it much easier to tell some of the colors apart.


Dwr 2: misc brands of dye ink.
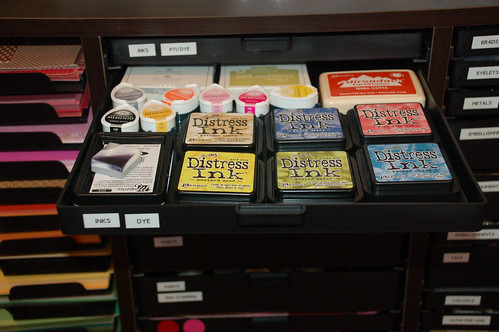
The second drawer has my misc dye inks - Ranger Distress, some SU!, Memento, Adirondack, and Memories.


Dwr 3: misc brands of pigment & chalk inks.
Drawer 3 (another 1" drawer) holds misc pigment and chalk inks.


Dwr 4: misc ink stuff.
A few more misc inks and stamping stuff.


Dwr 5: ink refills, glitter, Stickles, embossing stuff.
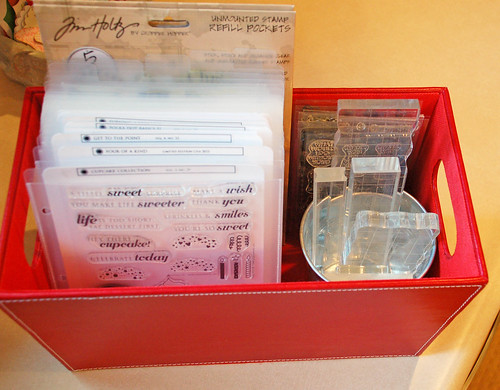
Drawer 5 is a 3" drawer and I used this tall size so that I could put my refills and Stickles in here standing upside down. Works beautifully. Do you see that white container that is holding the refills and the Stickles? I forget what that is called but I bought it at my LSS and it's wonderful. I could almost use one more. It was just a tad too tall but my handy DH filed it down for me. This drawer also holds my Versamark and my embossing powders. See those plastic boxes in the back of the drawer? Those are called Lock & Lock multi-use storage containers. They are 2.5 cup size and about 6" square and I can stack two together. I use one for clear embossing powder and one for white - my two most used colors. I keep a plastic spoon in each container and then just pour the powder on to my project right over the container - really reduces the mess factor!


Dwr 6: paints.
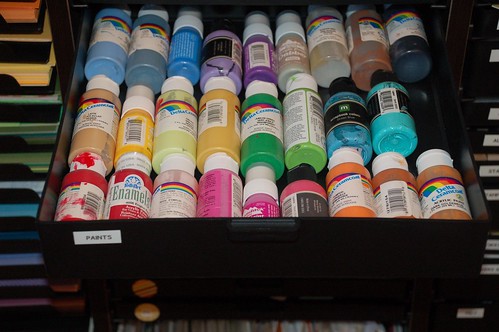
Next up is my paint. This is a 2" tall drawer and there are 27 bottles in here.


Dwr 7: misc paint & ink stuff.
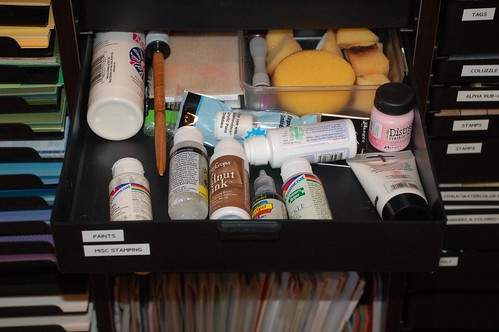
A catch-all drawer for those things that didn't fit elsewhere and are seldom used. This is another 2" drawer.


Dwr 8-15: Paper scraps
Paper scraps. It seems everyone is always on a neverending quest for the best way to store (and remember to use!) their paper scraps. This is what works for me. I have eight of the 1" drawers for my scraps and they are divided out like this: Red/Pink, Orange/Yellow, Green, Blue/Purple, White, Brown/Gray/Black, Misc Patterns, PTI.


Patterned paper by mfr
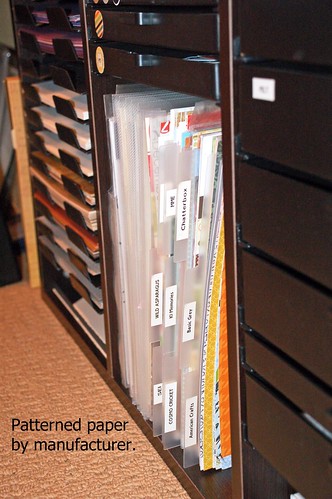
And on the very bottom of the middle section is where I have my patterned paper by manufacturer -
American Crafts, Basic Grey, Chatterbox (old stuff), Cosmo Cricket etc. Each mfr is separated by a Cropper Hopper divider. Here I also have just a few Cropper Hopper pockets that are separated by type of paper i.e. Christmas/Winter, Fall/Halloween, Birthday, School. I think there is only about five of these packets. The paper is so specific to that holiday that it made sense to keep them together.

Okay, how about the third column of the cabinet - the one on the right? Still want to see what's in those drawers? Be forewarned that I've been at this crafting business a long time and have lots of old stuff in there. You never know what you might find in there...


{3} Dwr 01: Brads
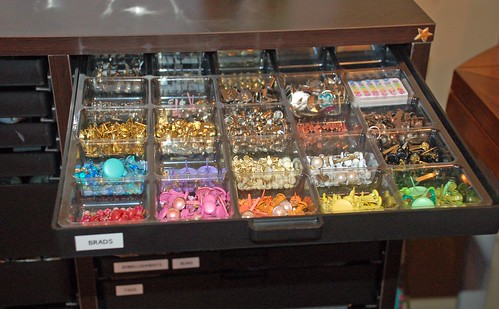
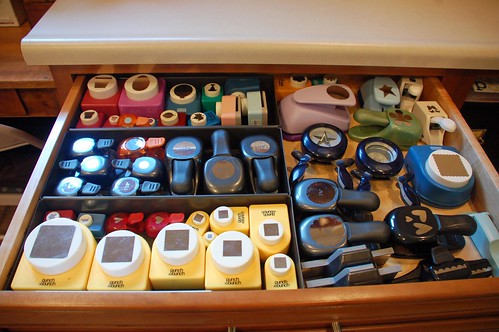
Brads separated by color. I used a plastic drawer insert, purchased from BSS.


{3} Dwr 02: Eyelets
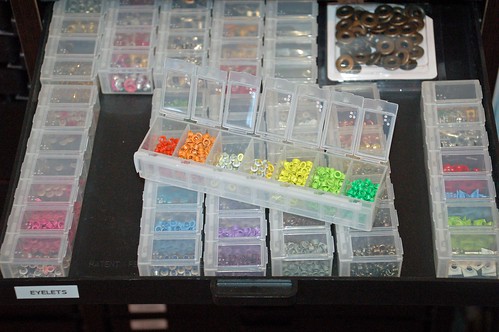
Eyelets separated by color and by size. Does anyone else remember when eyelets were all the rage? I was involved in several swaps 8-10 years ago and I still have some of those eyelets! I use so few of them nowadays. I thought about using a drawer insert for the eyelets like I did for the brads but I already had these pill box type containers and I've picked up spilled eyelets one too many times.


{3} Dwr 03: Metals
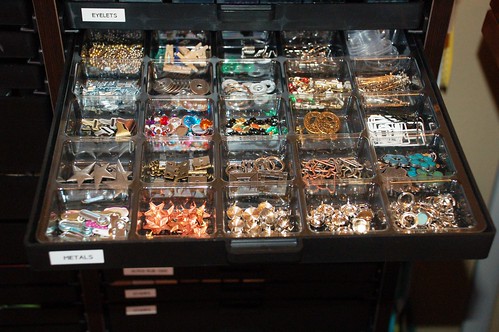
Metals and lots of it. Lots that I rarely use. But it's there "just in case". Again, I purchased a drawer insert for this drawer.


{3} Dwr 04: Embellishments
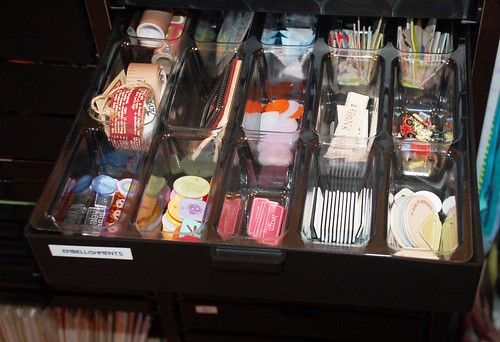
Embellishments. Lots of odds and ends, bits and baubles. In this drawer is the other type of drawer insert - it's longer and deeper.


{3} Dwr 05: More Embellishments
Another drawer of embellishments. Hmmm...maybe I should start using this stuff up? The thing is, I've used at least one or two of each of these items but the rest of the package just sits here waiting.


{3} Dwr 06: Bling
Bling and some smaller odds and ends.


{3} Dwr 07: Tags
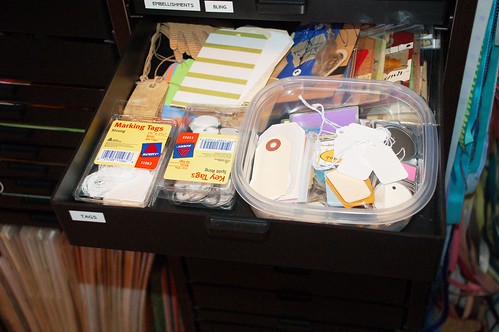
Tags. Remember when tags were all the rage? See those Rebecca Sower pre-made tags there in the back underneath the other stuff? I told you I've been at this for quite a while...


{3} Dwr 08: Coluzzle
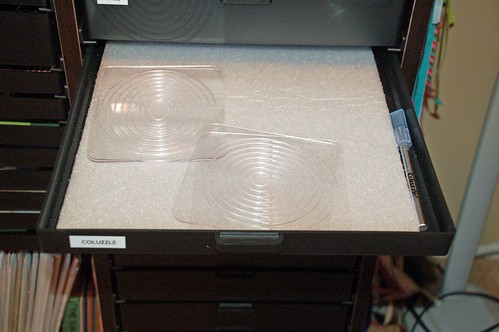
My Coluzzle. This is the best tool, IMO, for creating larger circles. So easy to use and takes up such little room. It's made by Provo Craft and I don't even know if they still make it.


{3} Dwr 09: MM Rub-on alphas
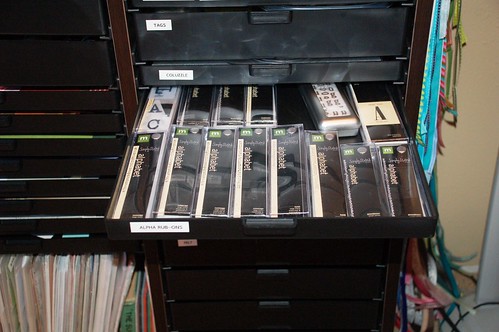
Making Memories alpha rub-ons. Got quite a few to choose from...


{3} Dwr 10: Wood mounted stamps
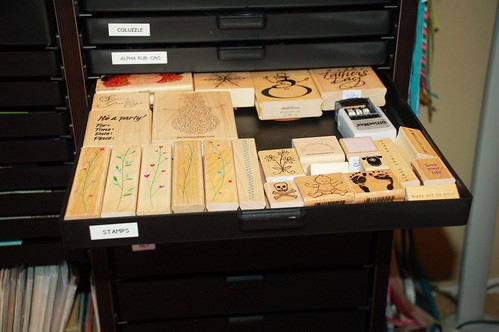
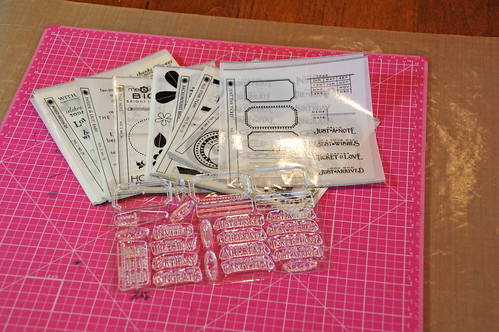
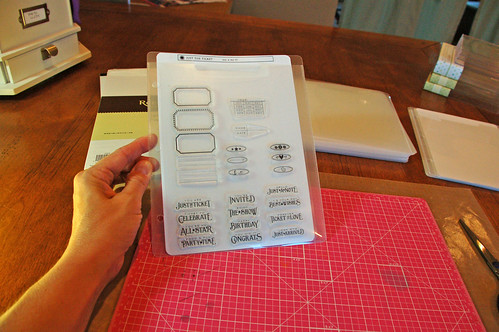
Most of my wood mounted, red rubber stamps. I culled most of my stamps this spring and gave a whole bag full to my kids' school. The counselor there does scrapbooking and cardmaking with the kids and she was so appreciative. And so was I that someone would take them off my hands! Along with some larger background stamps that are on another shelf, this is all I have left.


{3} Dwr 11: More wood mounted stamps
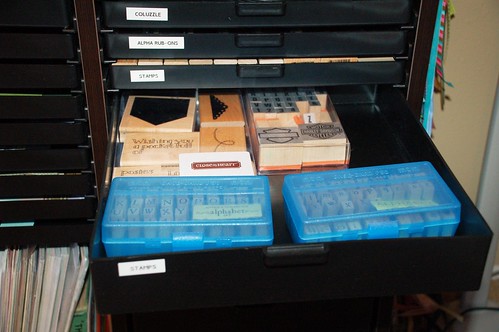
Just a few more stamps. The blue boxes you see are ammunition boxes and they hold the (very old) PSX alpha stamps. They fit perfectly!


{3} Dwr 12: Chalks etc.
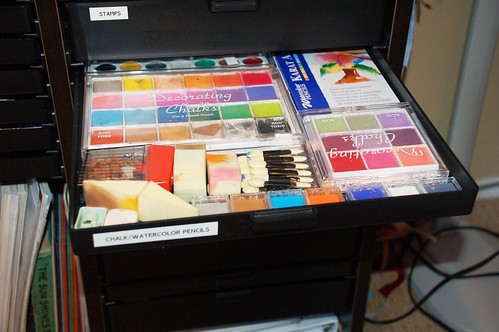
Chalk and watercolor pencils some other colorant stuff that I rarely, rarely use. Truth be told, I almost put this in the "give away" box. Just couldn't pull the trigger yet.


{3} Dwr 13: Pens & Markers
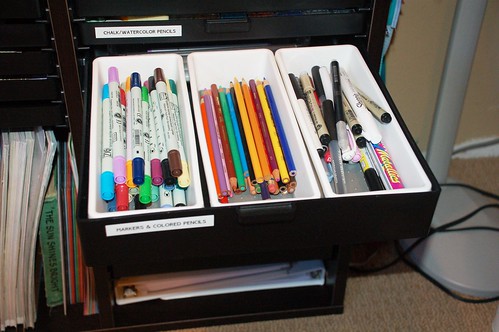
Zig markers, Prismas colored pencils, and misc pens. In the back of this drawer is my very small stash of Copics. I have four of them and am resisting buying more until I know how to make them work.


{3} Dwr 14: PTI felt
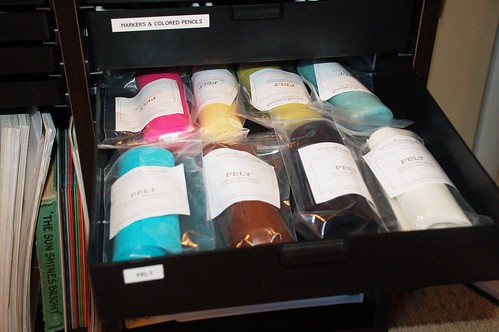
PTI felt! Look at all those yummy colors.


{3} Dwr 15: Big Bite
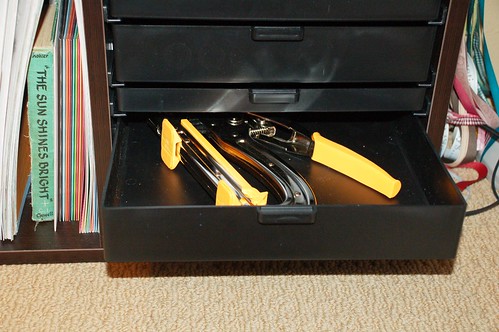
And in the very bottom drawer is my Big Bite. See that book to the left of the Big Bite? It's called "The Sun Shines Bright" and that's what I use for my vintage text. Fun little book.

I have two 2" drawers and one 1" drawer that are empty. Also, there is space below the bottom drawer (where my Big Bite is) that could house one 3" drawer. Right now that empty space holds two binders - an idea binder and a binder showing each of the stamp sets I own. I kind of like having the binders here so I may not order a 3" drawer to go in there. We'll see. ;)

Whew! What a long post. Thanks for reading all the way to the end. I couldn't be more pleased with how my Best Scrapbook Shelf functions in my room and I'm not shilling for them but I hope that if you're seeking a more organized craft space that you'll consider the Best Scrapbook Shelf.

Tuesday, August 17, 2010

Clear stamp storage

I love my stamps from PTI! They arrive with a clear CD case plus a label to adhere to the CD case. It was great at first. However, as my collection has grown over the past year and as I looked at my available space I knew I needed to make a change.

Current clear stamp storage in CD cases.
Here's my current storage. I have an antique dresser drawer hung on the wall and the CD cases lined up along the bottom shelf. My challenge was that not only was I running out of space but the CD cases would topple over as I pulled one, two, three, six sets off the shelf as I used them. I also had several sets that were fairly well smooshed into their cases. They needed some breathing room!

I'm a fairly organized person and I've learned what sort of organization and storage containers work best for me. I like drawers and I like to flip through files. I found this Youtube video and I really liked the idea.

So, here's my process I went through to get my stamps from their CD cases into a pocket.

Tim Holtz refill packets for clear stamps.
I bought lots of these Tim Holtz Unmounted Stamp Refill Pockets. I bought mine at Archivers. They come 5 in a pack for $3.

Here's what the Tim Holtz refill pages look like.
This is what the pocket looks like.

You'll need some plain, white cardstock.
You'll need some white cardstock. I bought the cheap stuff at Michael's. The cardstock is to place behind your stamps for two reasons - one, so the stamps don't stick to the pocket, and two, so you can see the stamps better. I cut rectangles of 6" x 8-7/16" and then rounded all four corners.

2010 08 06_2285_edited-1

Perfect size and it's even archival.
Next is the acetate. I found this at Michael's in the drafting and art supplies area. It is the PERFECT size. A match made in heaven! :) First, I cut the acetate sheets in half so they were 9" x 6". The sheets were just a bit long at 9" so trimmed them down to just under 8". And, again, I rounded all four corners with my Corner Chomper. I wanted the acetate sheet shorter than the white cardstock because I put my label at the top of the white cardstock and I didn't want the stamps blocking the name label. Make sense?

2010 08 07_2251_edited-1
With my latest PTI order I ordered lots of index labels for the sets that I already own.

Cut the labels.
Now it's time to get down to business of cutting the label and fitting the stamps to the sheet. For some sets, such as this smaller, $15 set of Just the Ticket, it was pretty easy to figure out how to place the stamps on the 6" x 8" sheet. For some of the bigger sets it was a bit more tricky. In the picture I'm cutting apart the labels and then sticking them to the acetate. The acetate appears to be white (even though it really is clear) because it is backed by tissue paper. Each acetate sheet in the package is separated by tissue. I found that it was easier to see what I was doing if I left the tissue backing until I was done.

Place the stamps on the label.
Remove the tissue paper and flip the acetate sheet over and then start sticking the stamps to the 6" x 8" sheet.

All done!
Here's the finished product. The name label of the stamp set gets adhered to the white cardstock, which is just a hair shorter than the pocket itself. Place the acetate sheet on the white cardstock and slip it into the pocket.

Look how thin this is!
See how much thinner this is! For some sets, such as All Star Team, All Star Team Additions, and Have A Ball, I have all three sets in one pocket. All Star Team is on the front, Additions and Have a Ball are on the back. They're all together in their happy family. :)

Bucket of clear stamps
Here's my basket of stamps now. When I took the picture I was only partly done so it's definitely looking more full now. I bought the basket at Hobby Lobby some years ago. It's wide enough so that the pockets can go on the left and a tin pail sits inside the basket, holding my acrylic blocks.


Another suggestion discussed on the PTI forum is for stamp sets that have matching dies to include the dies on the backside of the cardstock so that everything is together in one pocket. Brilliant idea, no? I store my dies another way but I'll definitely keep this idea in mind should I ever decide to change.

So far I'm really loving my new system. I hope this helps some of you who are looking for another way to store your clear stamps.